Tuesday, January 24, 2017

Rosemary's Light

We had the opportunity to meet Rosemary Cousins in person during the UK Casket tour and anyone who did knows she is a gem - such a creative person!  She blends her love for early English history and costuming with her love of Japanese crafts.  She also makes fabric covered boxes just to hold the things she is working on!  Amazing.  So when I saw her entry for her version of a blended box - I knew it was a Honorable Mention Award winner in the Modern category.  Rosemary also included some fantastic pictures showing the making of it to share with you that I find so interesting!

Background and Inspiration to My Small - by Rosemary Cousins

I am not intending on making a classic casket (initially) but rather a folding drawered lap desk that will contain all the bits and pieces needed for making yubinuki.  One of the things that would be a 'nice to have' in the desk would be a small work light.  Your challenge made me start thinking a bit more adventurously and I thought that turning it into a flower, specifically a tulip, would be fun.  I thought that I was being original until part way in my husband reminded me that this had been done in a scene from 'The Goodies' - a British comedy show from the early 1970's (seen here about 5 minutes in, if you care to and have the time .https://youtu.be/fjdyIQpOGy4  ). Because I  didn't know how much lucet braid I would need, besides 'lots' to create the petals, and I thought it could be interesting to try make, I decided to make my own, using perle thread so that it would be larger/wider, thus covering a larger area.  After collecting Period still life paintings   http://pin.it/EG4Ssb0  I decided to go with a variegated petal/thread.  The thread colour I settled on was not ideal, but came from the palette that I had decided on for the outer panels.

Manufacture of Small - by Rosemary Cousins

My first challenge was to find a suitable battery operated book light, which was resolved with an 'I lite' from here http://www.ebay.co.uk/itm/142119394459 . The stem I covered with 12 strand hollow round braid from Jacqui Carey' book on braids and sealed with Fray Check around the top.  Although if I had done this two weeks later, after I first saw an example, I would have used the 'Viking Wire Knitting' technique, as it looks just like plaited braid stitch in the round.  The 3 petals and 3 sepals were made from lucet braid which was laid over a polystyrene shaped egg pinned into position and then sewn together.  I started by laying the central rib of the petal, then delineating the outer edge (the shape of which owes more to modern tulips than their 17th C counterparts), covering about one third of the circumference, going under the point of the central rib.  Filling the right hand side in a circular fashion and then the left.  The first three petals were worked separately, but the second three were worked continuously.   I am not too sure how to disguise the clip.  Initially I had considered covering it with lacet tape, but now I am favouring working a circular stitch sampler of needlelace.


Monday, January 23, 2017

A Suite of Entries

Glenys Collie sent me three amazing entries and I picked one of a pair that goes together as a Honorable Mention Runner Up for the contest.

While I just loved her interpretation of the lacet gloves (they look so Elizabethan!), it was her innovative use of technique for the other two pieces that got my attention.  I had to ask her where she had gotten the yellow trim on the top - and to find out that it was the lacet that had one of the threads in the braid pulled so it would serpentine the entire lacet to make a new trim - mind blown!  A new way to use the lacet!!  So I awarded the award to her Umbrella measuring tape which goes with the Pin Cushion Cone.  I will show them both together below.

Umbrella Measuring Tape and Pin Cushion Cone

TAPE MEASURE - by Glenys Collie

An antique Umbrella Needlecase is part of my antique collection of needlework tools and it inspired me to create this dear little Umbrella tape measure along the lines of other antique tape measures.

TECHNIQUE UTILIZED - by Glenys Collie

Two pieces of silk fabric is the bases of the design.  One piece forms the lining and the outer piece is encrusted with 24ct antique gold beads, pearl purl and smooth purl.  Purple Lacet is added on one side in laid work with gold beads in the centre and intersections of pearl purl and edged with check purl..  This is matched on the other side with a bright pink Lacet grid, gold beads and intersections of pearl purl and again edged with check purl. The design also features scrolls of smooth purl, Pink Lacets flowers with gold beads and spangles.  These are balanced by a lovely green Lacet leaf containing a knotted centre vein and gold beads.  An antique trim from a antique sewing machine draw forms the umbrella handle.   A gathered gold Lacet puts the finishing touches to the top edge of the umbrella.  Inside is a silk ribbon handmade tape measure and an antique bone ring completes the tape.   This is a functional tape measure being wound in by turning the handle.   The lacet is made up of small threads and you can just pull one up (any one) and it gathers your lacet....what I did was put a dob of fray stopper where I wanted it to gather to and cut and then pulled it up and sealed off the end where I pulled it from then cut the length that I had previously sealed.

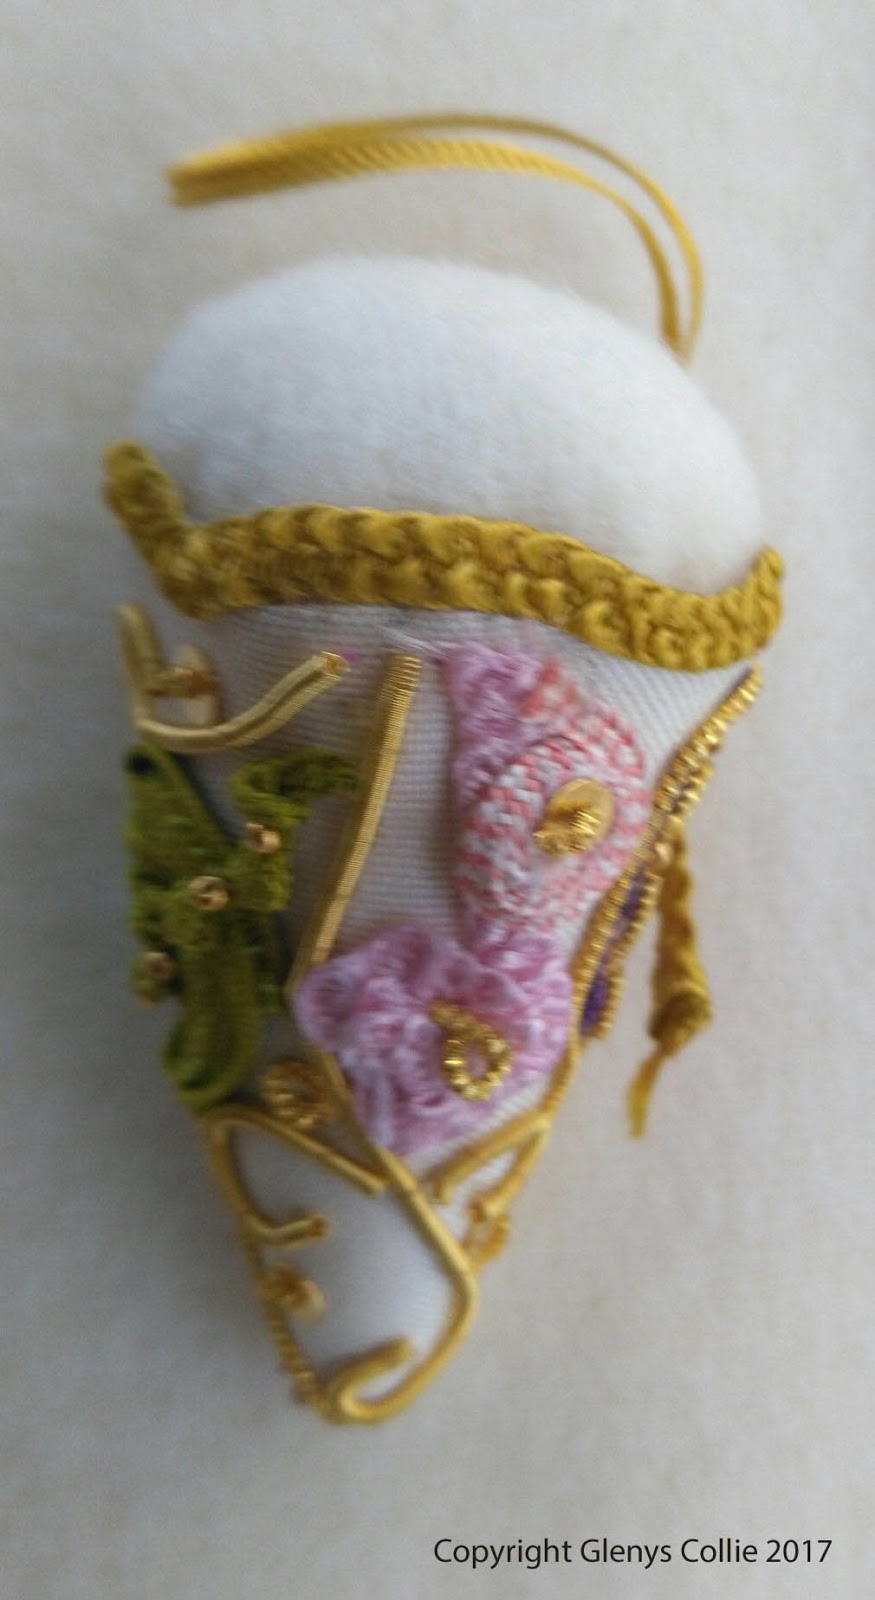
PIN CUSHION CONE -  by Glenys Collie

I was again inspired by Antique Pin Cushion cones and it was made in the same manner to compliment and partner the umbrella tape measure

TECHNIQUE UTILIZED -  by Glenys Collie

The same design and method as for the tape measure only stuffing the cone with wool wadding (so pins don’t rust) and a wool fabric circle added on the top. .  It features two pieces of silk fabric.  One piece forms the lining and the outer piece is encrusted with 24ct antique gold beads, pearl purl and smooth purl.  Purple Lacet is added on one side in laid work with gold beads in the centre and intersections of pearl purl and grid edged with check purl.  This is matched on the other side with a bright pink Lacet grid, gold beads and intersections of pearl purl and edged again with the check purl.The design also features scrolls of smooth purl, Pink Lacets flowers with gold beads and spangles.  These are balanced by a lovely green Lacet leaf containing a knotted centre vein and gold beads.  The finishing touches is added with a gathered gold Lacet trim and looped gold Lacet for hanging.


GLOVE - by Glenys Collie

I just love the gloves of centuries past for their design and history.  Some were made from white silk with very rich borders of gold and silk thread. They were intended to protect the hands and compliment your garments.  They were mainly worn by royalty, bishops and higher ranking men and women see link below to the history of gloves. I took my inspiration from these gloves and set about creating my design for this lovely little glove.


TECHNIQUE UTILIZED - by Glenys Collie

Inspired by the instructions in Thistle Threads  web instructions on construction but leaving fingers closed so it could become a little needlecase.  The basic glove was made with Lacet and trimmed with a fine Japanese gold thread.   The gold loops are stitched from smooth purl No 7. Below that is a row of pearl purl.  The little flowers are one row of very fine spiral purl with a No 24 antique red bead in the centre.  Each flower is divided by a small portion of pearl purl with another row of pearl  purl below that.  This is again repeated on the lower portion of the glove and finishing with another row of looped smooth pearl No. 7  The two outer edges are from a wavy purl.


Sunday, January 22, 2017

Mary's Pin Ball

Mary Ingram was also awarded a Honorable Mention Runner-Up Award for her sweet pinball.  At first it looks like a traditional pinball but then..... a measuring tape slides out of the middle!!  The measuring tape uses lacet as part of the pull.  Very clever to hide working mechanism inside a pinball!

Mary says that the pinball started its life as an antique tape measure (shown below) as her inspiration and she built the pinball around it

Pin Ball/Tape Measure

Inspiration - by Mary Ingram

This pin ball/tape measure started life as a tape measure shown at bottom ( eBay). Covered tab pull with lacet in buttonhole and Bargello done in silks from you on 36 ct linen.  Bottom pic shows lacet covered tab and some paint to prevent orange from showing.


Showing the tape pulled out


Internal Antique Measuring Tape


Saturday, January 21, 2017

The Casket Toy Contest Entries!

Today I will start with the first of the Honorable Mention Runner Up Winners and any additional entries they sent in.  I had 18 entries in all for the contest.  

Today's Honorable Mention Runner Up is the Lavender Wand Pin Cushion by Catherine Jordan.  Catherine also placed two more entries into the competition and they deserve much love too as they are just wonderful!  Catherine will be getting a selection of embroidery publications in the mail soon!

Lavender Wand Pin Cushion


Catherine's 5" long Lavender Wand Pin Cushion was inspirational in how she used the lacet to cover the wool, making something that often is used for fragrance into a useful needlework accessory!  

Inspiration - by Catherine Jordan

Lavender is a delightful fragrance, providing a calming, clean ambiance. I have fond memories of visiting a local lavender farm, having tea, and making lavender wands with friends. The fragrance of opening a linen drawer to a whiff of lavender is a special feeling. Making a miniature lavender wand that will last far beyond the dried wands, was fun and with the addition of essential oils, this miniature pin cushion will provide a special reminder of sweet memories from the past. 

How it was made - by Catherine Jordan


The stems which make up the structure of the wand are paper-wrapped wire. They were bundled and
tied together and then wrapped in merino wool to provide fullness at the top. The wires were then folded down over the wool and tied where the ribbon bow is now. Lacet flat braid was woven through the wires. Using 6 plies of lavender floss, Reverse Twist stitch and French knots were randomly worked into the lacing to give the appearance of the lavender flowers escaping from the wand. A green ribbon bow was added to finish the wand. 


 17th Century Traditional Casket Animal - Butterfly 

I think this entry was amazing in its use of custom dyed fabrics and layers of interesting threads.  I had been thinking of using soutashe in this way and am sooo glad that Catherine pioneered it!

Butterfly 3.5" x 4"

Inspiration - by Catherine Jordan

An online Soutouche class coincided with the Thistle Threads challenge and inspired this piece. Adapting this 16th century technique and combining the soutouche braid (also referred to as "Russia braid") and shibori silk with the various lacet, braids, bullion, and beads produced a highly embellished butterfly with interesting layers. 

How it was made - by Catherine Jordan

The wings and body were begun on a stiffened felt base and the shibori silk sewn on. Spangles and beads embellish the silk and the soutache braid finished the edges with more beaded edging. The Thistle Threads “Metals Trims and Beads Box” sampler included a wonderful variety of trims; The Gilt Russian Braid was wrapped with hand painted silk chenille to form the body and the antennae were made from expanded bullion. Wire was formed to make the legs so that the butterfly stands off the ground. 

17th Century Traditional Casket Toy Bag 

This piece is soooo sweet and lovely, playing off the game chip bags of the time period!  In this piece, Catherine needed lacet that was black and it doesn't come that way, so she used fabric paint to change the color!  Inspired.


Inspiration - by Catherine Jordan

A toy bag was the idea that gave rise to this black work piece with the idea that it could be filled with dice, gaming chips, and a small game board. The beautiful black work of the 17th century inspired the design and adorns the bag with a variety of flowers, leaves, and insects with the maker’s initials on the bottom. 

How it was made - by Catherine Jordan

The Thistle Threads “Metals Trims and Beads Box” sampler included a mixture of purls, bullions, and special trims in gilt. The ground fabric used was white Chinese silk dupioni backed with muslin for support and lined with an additional layer of white silk dupioni. Lacet was painted black and used for the snails and a variety of braids were couched for flowers and bugs. Expanded bullion was couched for small worms. Stitches used included: detached buttonhole, double running, satin, seeding, French knots, whipped double running, whipped stem, lattice, straight, and double running. The maker’s initials were monogrammed on the bottom of the bag. A twisted cord was run through detached buttonhole loops, so that the circle folded into a soft bag. Clay dice and chips and a small gaming board were made to accompany the bag (not shown). 

------------------------------------------------------------------------------------------------------------------------

We can certainly all agree that Catherine's entries were just beautiful and so creative!  Congratulations Catherine for your winning entry!

Friday, January 20, 2017

Eureka!! I have solved it!


Early versions of my Elements casket with a particular set of ladies with
the 'devices' in their hands.  Not too recognizable that this was the
elements Fire and Air.  Scrapped.
I wrote before last month about my design dilemma for my flat casket.  I wanted the Elements (Fire, Water, Air and Earth) and had been struggling with getting the panels right for several years.

That flat casket is actually all covered with paper and the interior is 95% done.  I just have to install the pincushion top and the mirrors on the walls - the print is already in the thing.

So over the weekend I was tired after the 'nth' set of kids were here and gone (many sleep here over the weekends so it never ends - already know this weekend's set), I was laying on the couch - which I never get to do - and decided to play with the design again.  And what did I find in another file??  A set of the Air and Fire sides that I had 'lost' that Noah and I had worked on together.

Old Fire Side.  Hard to fill in more of this design.
Lots of fire...
So funny that when I wrote that other blog entry it was niggling me that I had somehow solved the sides but 'obviously' I was dreaming as I couldn't find them.  Duh.  So now three sides done and if I used wrapped cards for the back, I would only have the top to figure out.  I had originally put the four elements on the four sides and planned the top as the Queen of Sheba scene (ok, there was one iteration before that with Harmony under a huge arbor with flowers and fruits in stumpwork).

None resonated with me because I kept arguing with myself about who got the back!!  I didn't want to put Earth or Water on a side as their devices (thing that went with them like the grotto, fish, etc) were too rich for the limited space.  But I had a fight with myself over who had to go on the back:  Earth with the fun stumpwork fruit or water with fishes, grotto and in the end a SHIP!  So that was the sticking point.

New Fire Side.  I might change the phoenix to the dragon
for fun, but this chariot and horses.. that could be awesome!
Then, I thought I would abandon the back and put both into one panel on the front.  Do something geometric to fill the back to solve that problem.  It will be against a wall anyways!  You'll see that option below in the pictures.  Ok... ish.  Still not perfect.  Could work but I wasn't so happy with the way the figures look in the faces.  I know that the stitching totally changes the faces.  But I just wasn't fully there.  The top was loosing interest for me as well as the Queen of Sheba.

Old Air Side.  Can't just fill all the space with clouds.
So boring to stitch.  
I have to show you many (not all) of the iterations here so you get the idea of how many ideas that look almost fully formed get tossed in the process.  I think that many people working on their own design get discouraged after something they have spent a lot of time on gets scrapped, thinking they aren't cut out for this.  This is just part of the process and a very, very necessary part to truly figure out what you like and want.  Something that speaks to you enough to get started and stitch on it!  Clearly I have had this casket ready to go (now two years) and haven't put fabric on a frame!  And my family can attest to that box being in our family room several times with curling pieces of paper lightly taped to the sides - being in my 'space' so I can glance at it and continue to either 'like it' or be 'not happy'.  It once had all sides and friezes on it.  The Queen of Sheba design on top.  I mean... truly pretty much ready to go.  And yet it wasn't right.  So I have been back to the drawing board.  (Of course watch out doing that - Son #2 already claimed the casket as his own - previous to the stitching.  Seems he likes the idea of Fire).
New Air side.  Much better.  Lots of animals, a cherub,
less clouds but note that the clouds on this side are pretty well
matched by the clouds on the other side (Fire) so the
casket colors will be better balanced.  And the sun here
can have reds/pinks/yellows to balance out the Fire
colors that are also radiating from the middle of Fire.

So I got out the motif for earth and started playing with it in my computer program on the top template.  I would need to add a lot of material to make it full.  But it would need to go with the theme of earth.  So into Google and looking up 17th century etchings of allegories of Earth, Air, Fire and Water to see the 'devices'.  Lots of trees, fruits and bunnies.  So maybe I add sheep, bunnies and more trees.  Grabbing said parts of other designs I was making some progress.

Then I decided to go and look at embroidered versions of Earth from actual caskets and mirrors.  That could help.  I knew that the top of the Martha Edlin casket was done in the Elements so I opened that up.  Note that they are represented in the four corners of the top by the devices only - no ladies.  While it gave me some stitch/color guidance for the fire and air part that would be useful later... nothing to add.  Then back to the search page and that is when EUREKA happened.

I had just been working on judging and writing about the Casket Toy contest so 3-D was in my mind.  There on the screen was Queen Elizabeth II's casket at Windsor Castle that we had visited.  That 3-D masterpiece that we are all hoping SOMEONE will do so we can see it.

Final and beloved Water front.  I CAN'T wait to stitch this side.
Problem solved.  No more symmetry issues on the top if I make it stand up like that.  And what better for an inspired 3-D scene on the top than the Earth Mother in all her glory.  I almost leapt off the couch to get stumpwork forms (then remembered I was tired) to make a cornucopia.  I went to bed happy and totally inspired.  I have the first two fruits already done.  This is something I can work on between other stuff.  Do a tent stitch side, make a few leaves and put in a box, work on the short casket project, take a break and make a small rabbit.  Put in box.  Before I know it - I will have all the elements of the top done by the time I get the two caskets done I am working on now.

I am sooooo excited.  Stay tuned for something amazing in a few years.   And did this flat casket start out being something that would be so fantastic?  Not at all.  It wasn't to be my opus.  Perhaps it will be.

Tricia


First Water Panel - on the back

A version of Earth and Water on the front panel

The element Earth from a mirror frame.  Hard to
work into a top as it is so asymmetric.  But I do
like the bunnies and the fruit basket (fun to stitch)

The Earth Top on my computer screen developing as I had my Eureka moment.  She will be sitting on a
mound.  There will be fruit trees around her.  Little animals like on the QEII casket.  OMG I am salivating just
thinking about it!

Top of Martha Edlin Casket with Harmony surrounded by Water, Fire, Air, and Earth.  

Close view of Royal Collection casket with the three dimensional stumpwork scene on the top.  Oh my gosh can
you just IMAGINE Mother Earth sitting there with a cornucopia and fruit spilling out.  Weak in the knees!


Thursday, January 19, 2017

Contest Awards - Other Medium!

I am waiting to hear from three award winners for permission to show their items on the blog and then we will get started... but before that, sometimes it is fun to see what people do in other mediums.  3-D printing is big in this house and there is something called a 3D Doodler that allows you to draw in plastic in the air (it is fun).  So click here to see the awards for the doodles of the year for their creative contest.  You will be amazed what people can do!

Tricia

Grand prize winner of 3D doodler contest by Cornelia Kuglmeier.  This was made from molten plastic coming out
of a pen...amazing

Saturday, January 14, 2017

Design Always Evolves!

Recalling my posts last month about "Getting Started" and some of the realities of designing something for yourself, I had to repost this photo from our NING conversation board.  Janet Brandt has been working on a very original design for her double casket for a few years and is getting closer to completion (the back is in embroidery progress right now).

Janet Brandt's Amazing "World of Possibilities" Casket (copyright Janet Brandt).  Stare at the picture of the mockup and the finished piece for awhile and compare the starting design with the finished piece.
If you haven't been able to follow her blogging about it, now is a great time to catch up.  Janet is an accomplished professional designer, author and artist.  So 'a pro'.  So it is highly useful to look at her mock up for her casket which incorporates the design idea she was running with when she started.

Those of us who are used to starting at the point where the designer has finished the project and is now writing the instructions for us to make a copy are usually unaware of the extreme level of uncertainty of the design/working process.  Many think that those who design start out with a fully completed vision.

I have to laugh (a nervous one) every day as people who want to do the June stumpwork short box stitch-along pepper me with emails, asking for the 'materials list' so they can buy the threads now.  The answer from me:  I have no clue.  That is the point, it will be designed as I go.  Do I have ideas?  Yes.  Do I have a line design?  Yes.  Do I have first-run prototypes of new threads on my table this very minute trying them out for it?  You bet.  But I won't have a list for a panel until I finish it myself.  And I won't have a good clue until I finish that first panel which will be the basis for the 'scheme' for the entire casket.  I have ideas of what I want to do and want to use.  But it might just happen that when I place it on the panel, the color is too washed out or the texture is just too low.  And then I will have to figure out a new idea.  That is how it goes.

So that is the theme of this year's Stitch-Along - Just Start.  There is absolutely NO WAY you can have a plan that you can stick to.  None of us are that talented.  Janet is one of the most talented people I know and if you carefully look at the mock up of the casket and the final piece, you will see some huge changes - almost unrecognizable from the first idea.  And note that the side of the mockup is blank. I am sure that Janet had an idea of what she wanted, but hadn't yet put it on paper enough to paste it to the side.

Now go back to the first blogs about this project and start to follow along with her.  There are just some amazing pictures of the process and discussion of trying out ideas on her mockup that you MUST look at if you are working on designing your own casket.  You will hear of many abandoned and changed plans and how the piece grew - and I am sure it grew to encompass more than what she had envisioned at first.  In fact I know it did as I know what is inside.  Every baby step results in new ideas, new confidence, and exploration of new concepts.  You will see that sometimes the idea totally changed and sometimes the idea has modified scale and details.  And in some places, the idea was yet to come - but she STARTED.  Yes, you could be scared off by the dates (late 2013) and she is still working on it.  But I know if you asked Janet, she wouldn't at all say that it is a bother and she is tired with it - she is having FUN.  (When you see the inside...you know she is having FUN).  When I got the first full 3-D shoes done in stumpwork I was literally squealing around here! It can be both frustrating, challenging, time consuming and FUN.

It is likely that your piece will result in growth of you as a stitcher - you will look back on things you did before and love them - but you might just cross the line from stitcher to artist without even realizing it.  :-)

It has been gratifying to follow the progress of many of the people working on the Cabinet of Curiosities and remembering back to their early emails and postings and getting new ones now of their experimentation with thread X and stitch Y and their mastery of it, frustrations and what they now 'see' in the old pieces and can make very informed and educated comments about what was happening historically because of their experience.  Tremendous, tremendous growth.  It is just so cool.  And I see so much more 'playing' happening now too.  That is the artist in you all coming out.  Very freeing.

So with that - I am going to start showing everyone the entries into the Casket Toy Contest next week.  They are playful as toys should be!