Friday, January 27, 2017

A Sweet Turtle!

Kirsten Doogue has entered a little turtle thimble holder made from a walnut!  So cute and I had to award her 2nd place in the 17th century traditional toy category.  One of the things I really was attracted to was her use of several of the techniques required (lacet on the shell and the expanded bullion for the head).  But uniquely she took the lace techniques  shown on a MFA casket and used fancy needlelace stitches to fill the space in the tape lace she made front he lacet.  It was quite inspired to make it look like a turtle shell!!  

Turtle 

Inspiration - by Kirsten Doogue

In my house, I have a curio cabinet on the wall.  I have loved collecting item for it each with a little memory behind it.  This past August, I was pleased to add my own version of the CoC2 ceylon frog to it.   He was so fun to make, that I decided I needed to design my own small animal.  I had made a lace posey before, so I wanted to use lacets in a different way for this project.  Your provided that inspiration with the photograph of the lacet used as tape lace on a stump work garment.  I then pulled inspiration from a V&A needlelace purse made from a walnut shell (photo enclosed) and the tape measure casket toy you published.  I put all these ideas together and decided on a turtle with a walnut shell embellished with lacet and needlelace that could store needles and a thimble.

Techniques Used - by Kirsten Doogue

My final turtle had the following components:  The turtles head and tail were made of trellis stitch.  The backside of the trellis stitch was used as the front.  Glass bead eyes and bullion wire were added as embellishments.  Legs were silk wrapped wire also embellished with bullion wire.  A walnut shell was painted gold.  A lace covering was then created.  Lacet was used as the "tape".  A few different needlelace types were then worked in the open spaces using a mixture of Gobelins and Gilt Silk Twist thread.  Stitches included buttonhole with return, double detached buttonhole and triple knotted buttonhole.  A piece of wired silk trim (from the frostings club) was used to finish up the base of the shell.  To complete the compartment, felt was cut to make a pocket for the thimble, a shell bottom, and a place for needles.  The bottom felt piece was trimmed with lacet and a small loop was created to go around the tail to hold the bottom closed.


Thursday, January 26, 2017

Virginia's Flying Cuties!

Virginia Whelan wins an Honorable Mention prize for her Queen Bee entered into the Traditional Casket Toy contest.  She also submitted a lovely dragonfly which is shown below too!  So she now has a duo of flying cuties!

The Queen Bee was interesting to me for her innovative use of the stumpwork fruit forms for the body of the bee, covered in lacet.  I wouldn't have thought to use them as forms for an animal!  So clever!  And the innovation didn't end on the bee, the dragonfly used a material I had never even heard of so I was thrilled to learn something new.  A material called Fosshape which is moldable polyester batting.  Who knew!?  Apparently it is use a great deal in cosplay costumes to make moldable shapes.  I will have to keep this in the back of my mind for many different things.


Queen Bee

Inspiration - by Virginia Whelan

After the challenge was received, I happened to be playing outside with my grandson, Foster, and we saw a bumblebee in the hydrangea bush. I took photos of it from several angles to understand its form and shape. The same day, I received a Barnes Foundation brochure on future classes including one on entomology, highlighted by a photo of a bee. From these two random bee encounters, it became clear that I was to make a bumble bee for the competition. I decided it was more appropriate to make a QUEEN BEE for the competition.... who wants to be a drone??


Dragonfly

Inspiration - by Virginia Whelan

This fall, I was fortunate enough to visit the Design Library in New York State. It is the world's largest archive of historic textile patterns and printed samples. The staff was reviewing the first copies of their newly published book (Phaidon Press). One page in particular caught my eye. The image of the dragonfly became the basis for my second casket toy.


Fosshape after steaming and forming, then with a wire around it to bend the tip of the dragonfly tail down

Covered in blue lacet


Wednesday, January 25, 2017

Tammy's Frog

Tammy Jones won a Honorable Mention for her lacet frog tape measure!  I loved the innovative way she used the lacet to build the frog and the wired legs used to roll up the tape measure.  Tammy also sent me a bookmark entry that used a variety of lacets she had made that was really beautiful!

Frog Measuring Tape Casket Toy

Inspiration - by Tammy Jones

My inspiration for this piece was several extant 17th century frog purses, particularly one located at the Ashmolean (www.ashmoleanprints.com/image/221387/anonymous-english-frog-purse) that appears to include some of the techniques used to make casket toys, and the revolving tape measure pictured on your blog. The tape measure idea was so brilliant that I just had to try it, and I’ve always wanted to make a frog purse, so I put the two together and made a tiny frog whose tongue is a tape measure. The tongue/tape measure is pulled by a tiny braid attached to the end and retracted by spinning the frog’s front legs. 

Techniques Used - by Tammy Jones


First, I drew a simple pattern shape to use as a guide, then using techniques from both the Pansy Casket Toy and the Lacet Gloves projects, I sewed green lacets together edge to edge to make the upper body of the frog. I then added spangles for eyes. Using the Bullion Snake project as a guide, I made 2 sets of legs from copper wire and wrapped one set (the back legs) with green cotton floss then 2 shades of green Soie Ovale. Before wrapping the second (front) set of legs, I cut a 15inch length of measuring tape, punched a hole in the metal end and braided a lace (a thin lace of 5 bows) directly onto the end of the measuring tape to use as a pull. The other end was then glued into the wire armature of the front legs and the same wrapping that was done on the back legs was worked on either side of the glued tape measure. The lower body of the frog was then made in the form of a small, green, silk, drawstring bag with open sides into which the front legs were inserted concealing the measuring tape inside. I used leftover green lacet for the drawstrings. I stitched the back legs directly to the bottom section of the underside of the upper body then stitched the lower body to the upper body sandwiching the back legs between them. To work the measuring tape, open the drawstrings and gently pull the frogs tongue out (It will measure to about 12 inches.). To retract the measuring tape, spin the front legs towards you. 


Multiple Strand Bookmarker

Inspiration - Tammy Jones

This project was inspired by the essay, “ Tiny Textiles Hidden in Books: Toward a Categorization of Multiple Strand Bookmarkers,” by Lois Swales and Heather Blatt and published in Medieval Clothing and Textiles, Volume 3 and the discovery of 15th century buttons at Lengberg Castle in Austria that may have been used as anchors for bookmarkers. Also, I have been totally enthralled with braided laces for about 20 years, collecting and voraciously reading every reference I could find on the subject. 

Techniques Used - Tammy Jones

First, using a bone button mold, Soie de Paris, and the instructions for Lengberg buttons found in Gina Barrett’s book, Buttons: a Passementerie Workshop Manual, I made the anchor for my bookmarker. When I finished the button, I realized that the threads did not completely cover the back of the mold, so I stitched a matching piece of felted wool to the back of the button. I then stitched a buttonhole bar across the back of the button to hold the braided laces. Using filament silk from DeVere, I braided four laces directly onto the buttonhole bar: a thin lace of five bowes, a broad lace of five bowes, an open lace of five bowes, and a lace maskel. Instructions for each of the laces can be found in the book, Take V Bowes Departed: A 15th Century Braiding Manual Examined by Elizabeth Benns and Gina Barrett. Unfortunately, the strain of braiding damaged the buttonhole bar slightly, so I had to do some repair work on the buttonhole bar once the braiding was finished. 


Tuesday, January 24, 2017

Rosemary's Light

We had the opportunity to meet Rosemary Cousins in person during the UK Casket tour and anyone who did knows she is a gem - such a creative person!  She blends her love for early English history and costuming with her love of Japanese crafts.  She also makes fabric covered boxes just to hold the things she is working on!  Amazing.  So when I saw her entry for her version of a blended box - I knew it was a Honorable Mention Award winner in the Modern category.  Rosemary also included some fantastic pictures showing the making of it to share with you that I find so interesting!

Background and Inspiration to My Small - by Rosemary Cousins

I am not intending on making a classic casket (initially) but rather a folding drawered lap desk that will contain all the bits and pieces needed for making yubinuki.  One of the things that would be a 'nice to have' in the desk would be a small work light.  Your challenge made me start thinking a bit more adventurously and I thought that turning it into a flower, specifically a tulip, would be fun.  I thought that I was being original until part way in my husband reminded me that this had been done in a scene from 'The Goodies' - a British comedy show from the early 1970's (seen here about 5 minutes in, if you care to and have the time .https://youtu.be/fjdyIQpOGy4  ). Because I  didn't know how much lucet braid I would need, besides 'lots' to create the petals, and I thought it could be interesting to try make, I decided to make my own, using perle thread so that it would be larger/wider, thus covering a larger area.  After collecting Period still life paintings   http://pin.it/EG4Ssb0  I decided to go with a variegated petal/thread.  The thread colour I settled on was not ideal, but came from the palette that I had decided on for the outer panels.

Manufacture of Small - by Rosemary Cousins

My first challenge was to find a suitable battery operated book light, which was resolved with an 'I lite' from here http://www.ebay.co.uk/itm/142119394459 . The stem I covered with 12 strand hollow round braid from Jacqui Carey' book on braids and sealed with Fray Check around the top.  Although if I had done this two weeks later, after I first saw an example, I would have used the 'Viking Wire Knitting' technique, as it looks just like plaited braid stitch in the round.  The 3 petals and 3 sepals were made from lucet braid which was laid over a polystyrene shaped egg pinned into position and then sewn together.  I started by laying the central rib of the petal, then delineating the outer edge (the shape of which owes more to modern tulips than their 17th C counterparts), covering about one third of the circumference, going under the point of the central rib.  Filling the right hand side in a circular fashion and then the left.  The first three petals were worked separately, but the second three were worked continuously.   I am not too sure how to disguise the clip.  Initially I had considered covering it with lacet tape, but now I am favouring working a circular stitch sampler of needlelace.


Monday, January 23, 2017

A Suite of Entries

Glenys Collie sent me three amazing entries and I picked one of a pair that goes together as a Honorable Mention Runner Up for the contest.

While I just loved her interpretation of the lacet gloves (they look so Elizabethan!), it was her innovative use of technique for the other two pieces that got my attention.  I had to ask her where she had gotten the yellow trim on the top - and to find out that it was the lacet that had one of the threads in the braid pulled so it would serpentine the entire lacet to make a new trim - mind blown!  A new way to use the lacet!!  So I awarded the award to her Umbrella measuring tape which goes with the Pin Cushion Cone.  I will show them both together below.

Umbrella Measuring Tape and Pin Cushion Cone

TAPE MEASURE - by Glenys Collie

An antique Umbrella Needlecase is part of my antique collection of needlework tools and it inspired me to create this dear little Umbrella tape measure along the lines of other antique tape measures.

TECHNIQUE UTILIZED - by Glenys Collie

Two pieces of silk fabric is the bases of the design.  One piece forms the lining and the outer piece is encrusted with 24ct antique gold beads, pearl purl and smooth purl.  Purple Lacet is added on one side in laid work with gold beads in the centre and intersections of pearl purl and edged with check purl..  This is matched on the other side with a bright pink Lacet grid, gold beads and intersections of pearl purl and again edged with check purl. The design also features scrolls of smooth purl, Pink Lacets flowers with gold beads and spangles.  These are balanced by a lovely green Lacet leaf containing a knotted centre vein and gold beads.  An antique trim from a antique sewing machine draw forms the umbrella handle.   A gathered gold Lacet puts the finishing touches to the top edge of the umbrella.  Inside is a silk ribbon handmade tape measure and an antique bone ring completes the tape.   This is a functional tape measure being wound in by turning the handle.   The lacet is made up of small threads and you can just pull one up (any one) and it gathers your lacet....what I did was put a dob of fray stopper where I wanted it to gather to and cut and then pulled it up and sealed off the end where I pulled it from then cut the length that I had previously sealed.

PIN CUSHION CONE -  by Glenys Collie

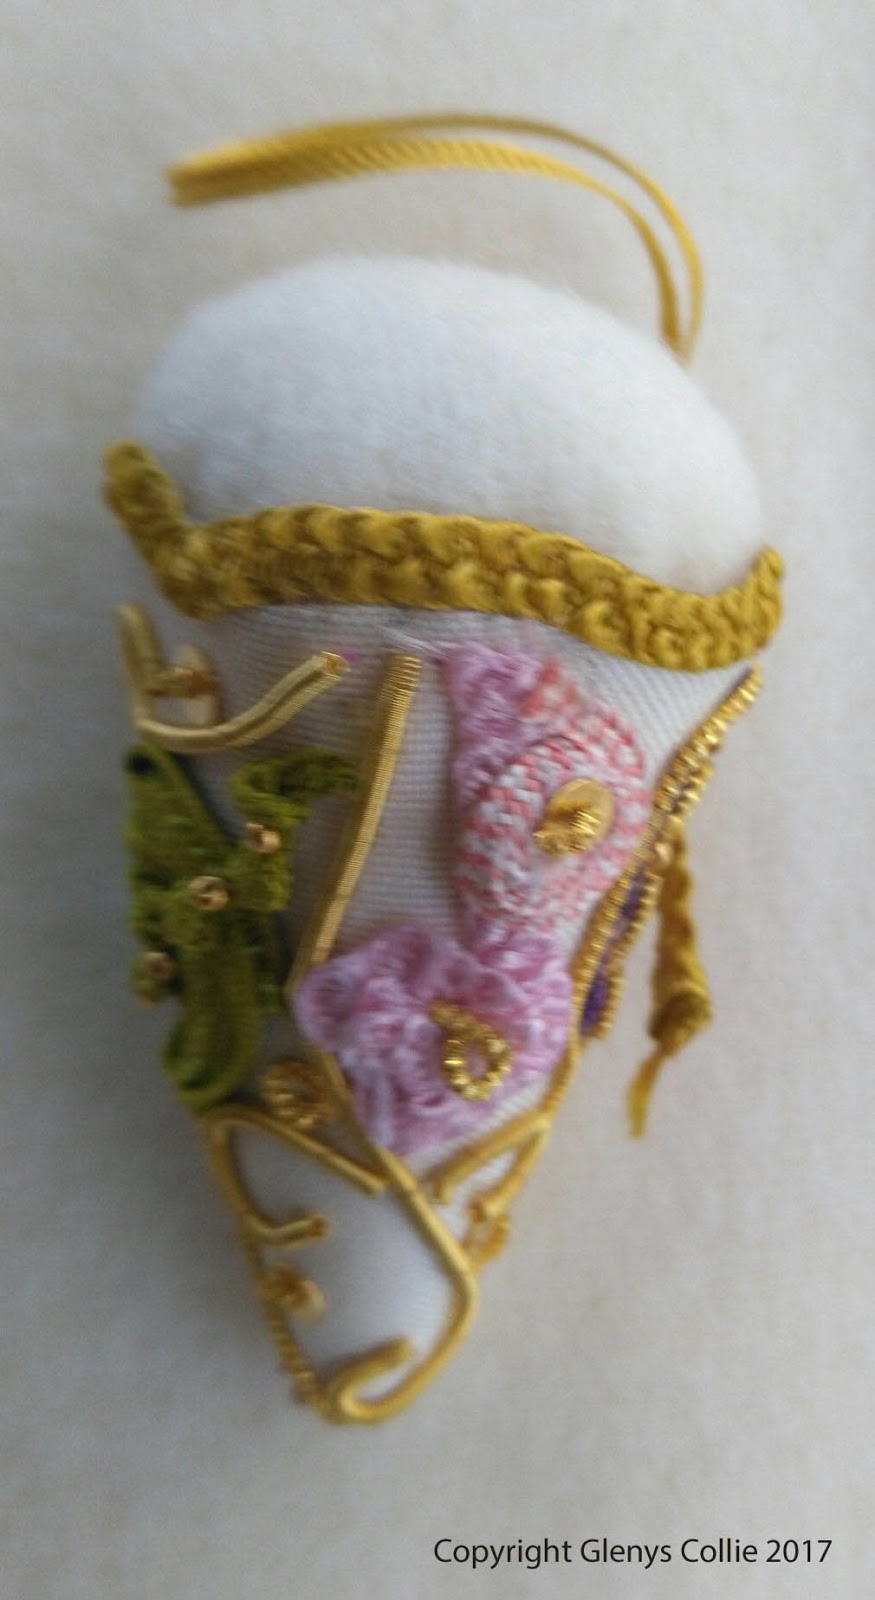
I was again inspired by Antique Pin Cushion cones and it was made in the same manner to compliment and partner the umbrella tape measure

TECHNIQUE UTILIZED -  by Glenys Collie

The same design and method as for the tape measure only stuffing the cone with wool wadding (so pins don’t rust) and a wool fabric circle added on the top. .  It features two pieces of silk fabric.  One piece forms the lining and the outer piece is encrusted with 24ct antique gold beads, pearl purl and smooth purl.  Purple Lacet is added on one side in laid work with gold beads in the centre and intersections of pearl purl and grid edged with check purl.  This is matched on the other side with a bright pink Lacet grid, gold beads and intersections of pearl purl and edged again with the check purl.The design also features scrolls of smooth purl, Pink Lacets flowers with gold beads and spangles.  These are balanced by a lovely green Lacet leaf containing a knotted centre vein and gold beads.  The finishing touches is added with a gathered gold Lacet trim and looped gold Lacet for hanging.


GLOVE - by Glenys Collie

I just love the gloves of centuries past for their design and history.  Some were made from white silk with very rich borders of gold and silk thread. They were intended to protect the hands and compliment your garments.  They were mainly worn by royalty, bishops and higher ranking men and women see link below to the history of gloves. I took my inspiration from these gloves and set about creating my design for this lovely little glove.


TECHNIQUE UTILIZED - by Glenys Collie

Inspired by the instructions in Thistle Threads  web instructions on construction but leaving fingers closed so it could become a little needlecase.  The basic glove was made with Lacet and trimmed with a fine Japanese gold thread.   The gold loops are stitched from smooth purl No 7. Below that is a row of pearl purl.  The little flowers are one row of very fine spiral purl with a No 24 antique red bead in the centre.  Each flower is divided by a small portion of pearl purl with another row of pearl  purl below that.  This is again repeated on the lower portion of the glove and finishing with another row of looped smooth pearl No. 7  The two outer edges are from a wavy purl.


Sunday, January 22, 2017

Mary's Pin Ball

Mary Ingram was also awarded a Honorable Mention Runner-Up Award for her sweet pinball.  At first it looks like a traditional pinball but then..... a measuring tape slides out of the middle!!  The measuring tape uses lacet as part of the pull.  Very clever to hide working mechanism inside a pinball!

Mary says that the pinball started its life as an antique tape measure (shown below) as her inspiration and she built the pinball around it

Pin Ball/Tape Measure

Inspiration - by Mary Ingram

This pin ball/tape measure started life as a tape measure shown at bottom ( eBay). Covered tab pull with lacet in buttonhole and Bargello done in silks from you on 36 ct linen.  Bottom pic shows lacet covered tab and some paint to prevent orange from showing.


Showing the tape pulled out


Internal Antique Measuring Tape


Saturday, January 21, 2017

The Casket Toy Contest Entries!

Today I will start with the first of the Honorable Mention Runner Up Winners and any additional entries they sent in.  I had 18 entries in all for the contest.  

Today's Honorable Mention Runner Up is the Lavender Wand Pin Cushion by Catherine Jordan.  Catherine also placed two more entries into the competition and they deserve much love too as they are just wonderful!  Catherine will be getting a selection of embroidery publications in the mail soon!

Lavender Wand Pin Cushion


Catherine's 5" long Lavender Wand Pin Cushion was inspirational in how she used the lacet to cover the wool, making something that often is used for fragrance into a useful needlework accessory!  

Inspiration - by Catherine Jordan

Lavender is a delightful fragrance, providing a calming, clean ambiance. I have fond memories of visiting a local lavender farm, having tea, and making lavender wands with friends. The fragrance of opening a linen drawer to a whiff of lavender is a special feeling. Making a miniature lavender wand that will last far beyond the dried wands, was fun and with the addition of essential oils, this miniature pin cushion will provide a special reminder of sweet memories from the past. 

How it was made - by Catherine Jordan


The stems which make up the structure of the wand are paper-wrapped wire. They were bundled and
tied together and then wrapped in merino wool to provide fullness at the top. The wires were then folded down over the wool and tied where the ribbon bow is now. Lacet flat braid was woven through the wires. Using 6 plies of lavender floss, Reverse Twist stitch and French knots were randomly worked into the lacing to give the appearance of the lavender flowers escaping from the wand. A green ribbon bow was added to finish the wand. 


 17th Century Traditional Casket Animal - Butterfly 

I think this entry was amazing in its use of custom dyed fabrics and layers of interesting threads.  I had been thinking of using soutashe in this way and am sooo glad that Catherine pioneered it!

Butterfly 3.5" x 4"

Inspiration - by Catherine Jordan

An online Soutouche class coincided with the Thistle Threads challenge and inspired this piece. Adapting this 16th century technique and combining the soutouche braid (also referred to as "Russia braid") and shibori silk with the various lacet, braids, bullion, and beads produced a highly embellished butterfly with interesting layers. 

How it was made - by Catherine Jordan

The wings and body were begun on a stiffened felt base and the shibori silk sewn on. Spangles and beads embellish the silk and the soutache braid finished the edges with more beaded edging. The Thistle Threads “Metals Trims and Beads Box” sampler included a wonderful variety of trims; The Gilt Russian Braid was wrapped with hand painted silk chenille to form the body and the antennae were made from expanded bullion. Wire was formed to make the legs so that the butterfly stands off the ground. 

17th Century Traditional Casket Toy Bag 

This piece is soooo sweet and lovely, playing off the game chip bags of the time period!  In this piece, Catherine needed lacet that was black and it doesn't come that way, so she used fabric paint to change the color!  Inspired.


Inspiration - by Catherine Jordan

A toy bag was the idea that gave rise to this black work piece with the idea that it could be filled with dice, gaming chips, and a small game board. The beautiful black work of the 17th century inspired the design and adorns the bag with a variety of flowers, leaves, and insects with the maker’s initials on the bottom. 

How it was made - by Catherine Jordan

The Thistle Threads “Metals Trims and Beads Box” sampler included a mixture of purls, bullions, and special trims in gilt. The ground fabric used was white Chinese silk dupioni backed with muslin for support and lined with an additional layer of white silk dupioni. Lacet was painted black and used for the snails and a variety of braids were couched for flowers and bugs. Expanded bullion was couched for small worms. Stitches used included: detached buttonhole, double running, satin, seeding, French knots, whipped double running, whipped stem, lattice, straight, and double running. The maker’s initials were monogrammed on the bottom of the bag. A twisted cord was run through detached buttonhole loops, so that the circle folded into a soft bag. Clay dice and chips and a small gaming board were made to accompany the bag (not shown). 

------------------------------------------------------------------------------------------------------------------------

We can certainly all agree that Catherine's entries were just beautiful and so creative!  Congratulations Catherine for your winning entry!